FreeUpscaler
Free tools run on your GPU · nothing uploaded

How to Fix Pixelated Photos

Blocky squares and stair-stepped edges smoothed away on your own graphics card. Free and unlimited — and measured, so this page can tell you which pixelation repairs and which only softens.

  • No sign-up
  • No watermark
  • Unlimited
  • Free tools never upload
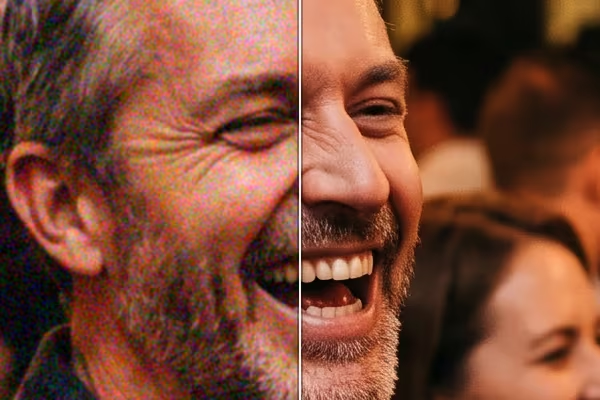
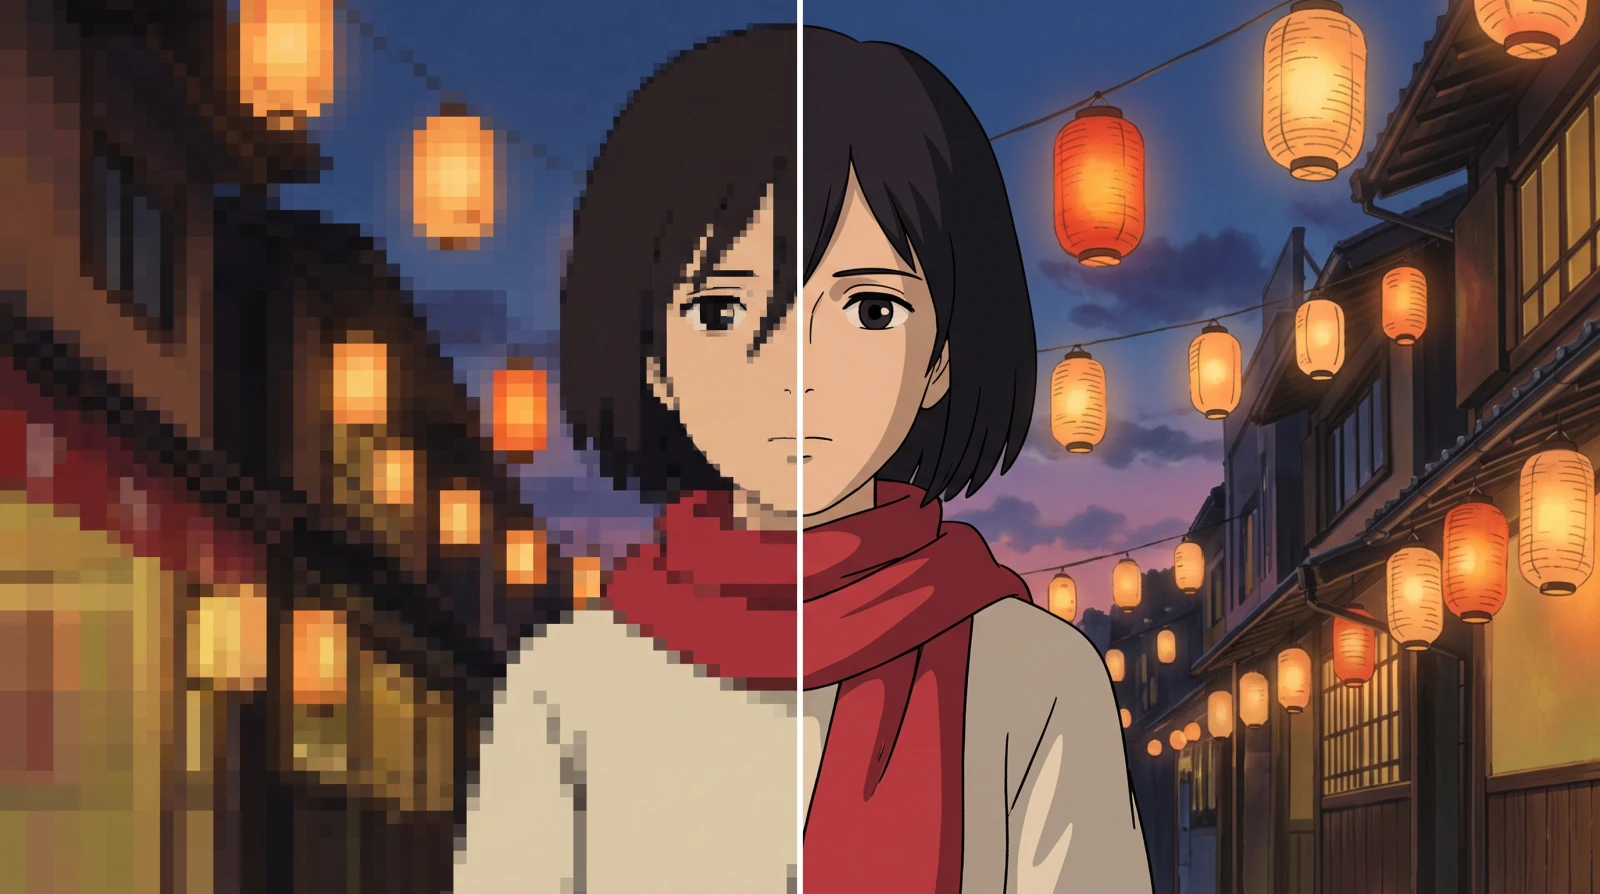
The sample before processing
The same sample untouched, for comparison
Example · not your fileBeforeAfter

Drop images here

One at a time

Checking what this device can do…Works with PNG, JPEG and WebP. Output is PNG.

How to fix a pixelated photo, or a pixelated image, in your browser

Open the image in a tool that reconstructs between the pixels instead of repeating them. This page does that locally: the block structure is smoothed, the image is rebuilt at the size you ask for by a Lanczos-3 filter, and a contrast-limited sharpening pass restores definition without the bright fringe ordinary sharpening leaves. It takes about 50 milliseconds to double a one-megapixel photo, with no upload, no account and no watermark.

Whether you came here looking for a pixelated photo fix, a pixelated image fix, or just how to fix pixelated image files you were sent, the first question is the same one: which of two very different damages you actually have.

How much you get back depends on where the blocks came from. If a compressor made them, a trained network can rebuild a good deal of what it discarded — measured, 1.03 dB closer to the original than anything free, on every compressed image tested. If somebody enlarged the photo before you got it, the detail was destroyed at that moment, and no method here beat a plain bilinear resize.

Measured 30 August 2026: eight photographs, two kinds of pixelation, two scales, fifteen methods, 480 runs on an Apple M-series GPU in Chrome, plus 128 runs of plain ffmpeg interpolation as a control.

See it work

What does the default actually change?

The comparison at the top of this page ran on your machine, on a photograph we ship that was pixelated the same way a real one gets pixelated. These are the numbers behind it.

≈ 50 ms
To double 1 MP
default method, laptop GPU
+1.03 dB
Trained vs free
on compression blocks, 8 of 8
0
Files uploaded
everything stays local
Free runs
no credits, no watermark
Diagnose it first

How to fix a pixelated image: which kind of pixelation do you have?

Two completely different things get called pixelated. Telling them apart takes one look, and it decides how much you can expect to get back.

KindWhat it looks likeWhere it came fromWhat can be recoveredBest result measured
Enlargement blocksLarge flat squares, staircased diagonals, edges too hardSomeone enlarged it by repeating pixels — an upscaled thumbnail, a screenshot blown up, a stretched avatarThe blocks, but not the detail — it was discarded before the file reached you0.38 dB behind a plain bilinear resize — the control won
Compression blocks8 × 8 tiling, mosquito fuzz around edges, colour smearingHeavy JPEG, a messaging app, a photo re-saved several timesA useful part of the detail — the compressor quantised it rather than deleting it2.36 dB ahead of leaving it alone, 1.03 dB ahead of the free method
Enlargement blocks — a 100% crop of the same frame

Enlargement blocks · default method · 30.36 dB from the original

Compression blocks — a 100% crop of the same frame

Compression blocks · default method · 33.43 dB from the original

The same photograph, damaged two ways, then doubled by the same method. Shown as 100% crops — a whole frame shrunk to fit a page looks identical whatever produced it. The left pane still carries the staircase of the enlargement it arrived with; the right is softer but far closer to the original photograph. 3.1 dB apart, same method, same picture. Both came out of the evaluation run; neither was retouched.

The distinction is not cosmetic. When a compressor makes blocks, the picture is still encoded — badly, in coarse steps, but the information about what was there survives in the coefficients it kept. A network trained across many JPEG qualities has learned what those coarse steps usually stand for, and can put a plausible and often correct version back.

When somebody enlarges an image by duplicating pixels, nothing survives. A 600-pixel-wide photograph blown up to 2400 contains exactly 600 pixels of information stretched over four times the area. There is no coefficient to reinterpret and no residual to learn from, which is why every method that can double an image here finished behind a plain bilinear resize on that damage — and why the honest promise for that case is “the squares will stop being visible” rather than “the photo will be restored”.

Which method

Which method should I use for my image?

Two, out of the fifteen that could technically run here. The other thirteen were cut on measurements, not on taste — each one lost, or won by an amount too small to be a second option.

MethodBest forScaleSpeed on a 1 MP photoDownload
Soft (default)Everything, and the right first try1×, 2×, 3×, 4×≈ 50 msNone
Unpixelate (Trained)Blocks left by heavy compression2× only≈ 0.83 s4.9 MB, once
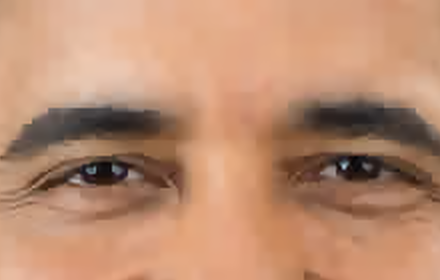
Soft — a 100% crop of the same frame

Soft · no download · 91 ms · 33.43 dB

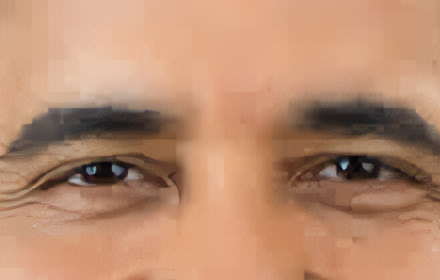
Unpixelate (Trained) — a 100% crop of the same frame

Unpixelate (Trained) · 4.9 MB · 1.37 s · 34.30 dB

The same crop of the same heavily compressed photograph, doubled by each method, at 100%. This is the case where the download earns itself: the trained network puts back eyelashes and skin texture the default can only average away, and it lands closer to the original photograph while doing it. Both panes came out of the evaluation run; neither was retouched.
Compressed test imageSoftUnpixelate (Trained)Closer to the original
Web page capture31.9734.11Trained, by 2.14 dB
Interface capture31.2933.49Trained, by 2.20 dB
Cel animation, dark scene33.2434.24Trained, by 1.00 dB
Studio portrait33.4334.30Trained, by 0.87 dB
Product shot, logo detail37.3037.98Trained, by 0.68 dB
Cel animation, daylight scene35.4336.07Trained, by 0.64 dB
Product shot, knit texture25.5126.07Trained, by 0.56 dB
Archive portrait27.9128.08Trained, by 0.17 dB

All eight compressed images in the run. Each was shrunk, re-saved at a punishing JPEG quality, rebuilt by every method, and scored against the photograph it came from. Higher is closer to the original; the unit is decibels, and every 6 dB means the remaining error has halved.

The trained method wins all eight, by 1.03 dB on average. It also beat plain bicubic interpolation by 1.42 dB and beat leaving the file alone by 2.36 dB. Where it gains most is screen captures — text and interface edges are exactly what a compressor mangles and exactly what a network trained across JPEG qualities has seen thousands of. Switching method re-runs your file in a second or two, so the comparison is cheap to make yourself.

One caveat worth publishing: on structural similarity, a second measure that weighs local contrast and texture rather than raw pixel distance, the free default came out ahead — the highest score of anything tested on compressed images, including the network. The two measures disagree, which is why both were recorded and why the default was left as the default.

The ceiling, published

What is the best possible result on a pixelated photo somebody already enlarged?

A plain bilinear resize. Not a network, not a shader — the oldest and simplest resampling filter there is. We measured it as a control, and every method here that can double an image finished behind it.

Soft (this tool's default) — a 100% crop of the same frame

Soft (this tool's default) · 30.36 dB from the original

Plain bilinear (the control) — a 100% crop of the same frame

Plain bilinear (the control) · 30.84 dB from the original

The same pixelated photo, doubled two ways, at 100%. The right pane is four lines of ffmpeg with no model behind it, and it lands closer to the original photograph than the tool’s own default does — on this image by 0.48 dB, and across all eight pixelated photos by 1.15 dB, losing none of them.
Pixelated photo, enlarged by somebody elseSoftUnpixelate (Trained)Plain bilinear (control)
Cel animation, daylight scene27.6528.2931.06
Cel animation, dark scene25.1526.0527.81
Archive portrait23.8223.7424.29
Studio portrait30.3631.0130.84
Web page capture25.7326.8226.11
Interface capture24.8625.9725.19
Product shot, logo detail32.9033.6733.61
Product shot, knit texture20.8421.9421.56
Average26.4127.1827.56

The control wins the average, and it wins on structural similarity on six of the eight images against the default and on all eight against the trained network. The trained network is the closest anything got — 0.38 dB behind — and it is the one worth reaching for if you want the blocks gone without the picture going soft, because at that distance from the original it holds about 18% more edge energy than the blur does. But nothing here reconstructs what an earlier enlargement threw away, and this table is what that looks like as numbers.

Why the simplest filter wins

Because the edges in a pixelated image of this kind are fake. Every reconstruction filter is a bet about what lies between two samples, and the wider its reach, the more confidently it preserves an edge it finds. Ordered by reach, the controls came out in exactly that order on already-enlarged images — bilinear 27.56, bicubic 27.01, Lanczos 26.85 — and in the opposite order on compressed ones, where the edges are real. Every method in this tool is built on Lanczos-3 reconstruction, which is the right choice for a genuinely small photograph and the wrong one for a grid of duplicated pixels.

So the practical advice is blunt, and it is worth more than any method on this page: find the original file. Repairing a copy that was already enlarged cannot beat opening the file it was enlarged from. If you cannot find it, this tool will take the squares out and give you the size you need, which is a real service — it just is not restoration, and this page is not going to call it that.

The counterintuitive one

Why does sharpening a pixelated photo make it worse?

It is the first thing most people reach for, and it is measurably the wrong move — because the hardest edges in a pixelated image are the ones you want gone.

Soft — a 100% crop of the same frame

Soft · edge energy 0.53× the original · 33.43 dB

Sharpened instead — a 100% crop of the same frame

Sharpened instead · edge energy 0.86× the original · 31.18 dB

The same compressed photograph through the default and through a deblurring method, at 100%. The right pane is genuinely crisper, and what got crisper is the compressor’s 8 × 8 tiling — the tiles are now drawn in hard lines across the forehead. It also finished 2.25 dB further from the original than the default did.

Edge energy here is the mean Sobel gradient, and the original photograph is the scale — every figure is a ratio to it. The number that explains this whole section is the one for the damaged input: 1.40. A pixelated file carries forty per cent more edge than the picture it came from, because block boundaries are edges. Pixelation is a surplus of edge, not a shortage, and every method that helps removes some.

The deblurring method was the only one of the fifteen that averaged above 1.00 instead of below: 1.10 on compressed images, above the original on six of the eight, and last on fidelity on both kinds of damage. That is the trap in one line — a sharpener cannot tell a block boundary from a cheekbone, and there are far more block boundaries.

This is also why the default here is called Soft rather than something more heroic. Among methods that need no download it was ahead on all sixteen damaged images, and the reason is exactly that it smooths before it enlarges rather than trying to preserve the edges it finds. If your image is soft rather than blocky, that logic reverses and the blurry photo page is the right one.

Set expectations

What can this actually fix?

Every grade below is a measured position, not a guess. Detail that was never recorded cannot be recovered, and knowing which case you have takes about ten seconds.

  • Improves a lot

    Heavy JPEG compression

    Photos that have been through a messaging app or re-saved several times. The trained method gained 2.36 dB over leaving them alone and led on all eight compressed test images, in all four content types.

  • Improves a lot

    A small image you need bigger

    A thumbnail, an avatar, a web graphic at display size. Nothing was destroyed by an earlier tool, so reconstruction has real samples to work between, and the result improves with the scale you ask for.

  • Improves some

    A photo somebody already enlarged

    The most common arrival and the hardest case. The blocks go away, and that is the whole gain: across eight such images every method this page offers finished behind a plain bilinear resize. Find the original file if you possibly can.

  • Improves some

    Screenshots of small on-screen images

    The same problem wearing a different hat — the capture holds only the pixels that were being displayed. If the capture was also compressed, this is where the trained method gained most of all: 2.14 and 2.20 dB on the two screen captures in the run.

  • Cannot be fixed

    Deliberately pixelated areas

    Censored faces, redacted plates, blurred documents. The information was destroyed on purpose. Any tool that produces a readable result there has invented a plausible one, which is worse than nothing.

  • Cannot be fixed

    Motion blur and camera shake

    Not pixelation at all: each point of the scene was smeared across pixels while the shutter was open. Nothing in this tool addresses it, and the sharpening methods make it look worse rather than better.

How to use it

Three steps, no account

Everything happens on this page. There is no upload to wait for and no email to confirm.

  1. Step 1

    Drop the image in

    Drag one file or a dozen onto the box above, or click to browse. PNG, JPEG and WebP all open. The page checks what your device can handle before you choose, so limits turn up before the work does.

  2. Step 2

    Pick a scale, then judge the damage

    2× is the safe default. Look at the result at 100%, not fitted to the screen: if the blocks were tidy 8 × 8 tiles, switch to Unpixelate (Trained) and let it re-run — that is the one comparison worth making, and it won all eight compressed test images. If they were large ragged squares, the default has already done what can be done, and so has everything else.

  3. Step 3

    Compare and download

    Drag the before/after slider over an area with real detail — hair, fabric, type — rather than over a flat wall. Then download. No watermark, no sign-up, and no limit on how often you do it.

Why it is different

Free without an asterisk

Two damages, two answers

This page separates the pixelation a compressor caused from the pixelation an earlier enlargement caused, because they have different ceilings — and publishes both, including the one where a four-line ffmpeg control beat every method we ship.

Nothing is uploaded

The file is decoded, processed and re-encoded inside this tab. There is no server in the loop and nothing for anyone to store.

No account, no watermark

No email, no sign-in wall before the download button, and no logo stamped across your picture.

Works offline

Load the page, disconnect from the internet, and it still runs. That is the proof the privacy claim is real rather than a policy.

Starts instantly

The default is shader maths — no model download, no queue, about 50 milliseconds to double a one-megapixel photo, and it never becomes unavailable because a file failed to fetch.

A real model when it earns it

One trained network is offered, for the damage it measurably repairs. It is 4.9 MB, it is optional, and this page says exactly where it stops helping — 0.38 dB behind a plain resize on the other damage.

Get more out of it

What else changes the result when you fix a pixelated image?

Find the original before you fix a copy

This is worth more than any method on this page. A pixelated file is usually a bad copy of a good one — check the original email, the camera roll, the source website, the message thread it came through. Repairing the copy can never beat opening the original, and the measurements say so bluntly: on pixelated photos of this kind every method this page offers finished behind a plain bilinear resize, and the default finished level with doing nothing at all.

Do not stack enlargements

Running an already-enlarged image through again compounds the guesswork, and it is exactly how a file arrives in the state this page exists to treat. One pass, at the size you actually need.

Ask for the size you need, not the biggest one

Going to 4× does not buy more detail; it spreads the same information over four times the pixels. It also costs time in proportion to the pixels produced rather than the pixels you started with, so a 4× pass is roughly four times the work of a 2× one. If the destination is a screen, 2× is usually the whole job, and it is the size every figure on this page was measured at.

Printing a pixelated image

Paper exposes pixelation far more harshly than a screen does, because print resolution is much higher. Enlarge here first, then set a real print resolution on the DPI page — which, unlike the usual DPI converters, resamples the pixels rather than only rewriting the file header.

The catch, explained

Why do the other unpixelate tools stop being free?

It is arithmetic rather than greed — a hosted run costs more in GPU time than an ad-supported page view earns.

FreeUpscaler

runs locally
  • Unlimited images, no credit counter
  • No watermark on the result
  • No account or email required
  • Files never leave your device
  • Publishes the case where a free control beats it
  • Needs a desktop browser with WebGPU

Hosted unpixelate tools

typical free tier
  • Credits or a monthly export cap
  • Watermark until you upgrade
  • Sign-up wall before download
  • Your files are uploaded to their servers
  • Claim to unpixelate anything
  • Runs on any device, including phones

Search for a way to unpixelate an image and you will find a dozen tools, all of which stop being free at the same point: three images a month, a watermark, a sign-up wall before the download. Anyone renting GPUs by the minute has to meter you or lose money on every visitor. Moving the work onto your machine takes that cost to zero, which is the only reason this page can offer unlimited use with no account.

It also changes what is worth saying. A tool that has to convert you has an incentive to claim it can unpixelate anything; a tool that costs nothing to run has no reason not to tell you the case where it cannot.

More tools

Not quite the right page?

FAQ

Frequently asked questions

How do I fix a pixelated photo?+

Drop it into the tool at the top of this page and pick a scale. The default method smooths the block structure away, enlarges with a Lanczos-3 reconstruction filter and applies a contrast-limited sharpening pass, all on your own graphics card — about 50 milliseconds to double a one-megapixel photo, with nothing uploaded and no account. How much you get back depends entirely on where the blocks came from. If a compressor made them, switching to the trained method is worth the 4.9 MB download: over eight compressed photographs it landed 1.03 dB closer to the original than the best zero-download option, on every one of them. If somebody enlarged the photo before it reached you, the honest answer is that the blocks will go and the detail will not come back.

What makes a photo pixelated in the first place?+

Two different things, and they need different treatment. Either somebody enlarged the image with software that repeated pixels rather than reconstructing between them, so each original pixel became a visible square; or a compressor quantised the image in 8 × 8 tiles and left visible seams between them. The first destroys the detail before you ever see the file. The second only discards part of it, which is why it responds far better to repair.

Can pixelation be removed completely?+

The blocks can always be removed. The detail underneath usually cannot. On eight photographs that had been shrunk and then enlarged again by pixel duplication, nothing this page offers beat a plain bilinear resize — the best trained network finished 0.38 dB behind it and lost on structural similarity on all eight. On heavily compressed photographs the same network gained 2.36 dB over leaving the file alone. Deliberate pixelation — a censored face, a redacted plate — cannot be reversed by this or by any other tool.

Which method should I pick?+

Start with Soft, the default. It needs no download, finishes in about 50 milliseconds on a one-megapixel photo, and across all sixteen damaged test images it was ahead of every other zero-download method, on both kinds of pixelation and on both metrics. Switch to Unpixelate (Trained) if the blocks came from compression — a photo that has been through a messaging app, or re-saved as JPEG several times. That one is a 4.9 MB download, takes about eight tenths of a second on the same photo, and led on all eight compressed images by an average of 1.03 dB.

Why does sharpening make a pixelated photo look worse?+

Because a pixelated file already has too much edge, not too little. Measured with a Sobel gradient, the damaged images carried 1.40 times the edge energy of the originals they came from — the surplus is block edges. The deblurring method was the only one of the fifteen whose output averaged sharper than the original photograph: 1.10 times it on compressed images, above it on six of the eight, while finishing last on fidelity both times. It makes the squares crisper, not the picture.

Should I enlarge a pixelated image, or shrink it?+

If you only need it small, displaying it at its native pixel size removes the pixelation completely, for free, with no processing at all — worth checking before you run anything. Enlarging is what this tool does and it is the right move when you genuinely need more pixels, for print or for a large screen. Ask for the size you actually need, though: enlarging further does not add information, it spreads the same information over more pixels.

Is it free, and is my photo uploaded?+

Free with no account, no watermark and no limit, and nothing is uploaded. The image is decoded, processed and re-encoded inside this browser tab using your graphics card. You can verify it: load this page, disconnect from the internet, and it still works.

Why do other tools claim they can fix a pixelated image completely?+

Because a generative model can invent a plausible face where a blocky one was, and a screenshot of that looks impressive. It is not the same picture. Every number on this page is a distance from the original photograph, measured by rebuilding a damaged copy and comparing it to the file it came from, with a plain ffmpeg resize included as a control — which is the only way to tell reconstruction from invention, and the only way to find out that on one of these two damages the control wins.

More free tools on this site

Fix pixelated photos, and pixelated images, right now

No account, no watermark, no limit. Drop a file in and it is processed on your own machine.

Choose a file